“Los“craft“DIY“About"Contact

Jun 26, 2012

DIY: Cork Tile Placemat From Wine Corks


If you're a cork collector like me, this DIY project is for you. Wine drinkers know how many leftover corks you can accumulate over the years, so let's put them to use! Not only do I love wine, but I love using cork for crafting projects. It's easy to cut, naturally waterproof with a beautiful rustic look, and it has a cushion material that makes for the perfect handmade placemat.

The DIY possibilities are endless by simply gluing corks together. You can also make coasters, table runners, trivets, floor mats or cork boards, just to name a few. Make one for yourself or maybe a gift for a wine lover? The best part is, if you know how to use a glue gun, you'll be a pro at this project.

Follow the steps below to make your own upcycled cork placemat. 


Materials:
• Approximately 50 wine corks. Don't have some handy? You have some options: (a) drink lots of wine (b) ask your local restaurants, bars or wine shops or (c) buy them online
• Utility knife
• Hot glue gun

Tip: Use as many red wine corks as possible to add some beautiful shades of red to your placemat.


Jun 19, 2012

DIY: Ombrè Vase From A Juice Jug


I've been eager to post an ombrè-inspired DIY tutorial after seeing so many adorable projects pop up on Pinterest lately, including this picnic blanket and this beautiful flower centerpiece. The dark-to-light finish creates such a beautiful contrast of colors, especially when you add flowers!

I chose an oversized juice bottle to create my ombrè flower vase, because I just love its big round bottom and tiny handle at the top! But you can use anything from wine bottles, soda cans or even milk cartons, so look around the house for anything that has a flattering shape.

Follow the steps below to make your own custom vase that will be sure to add a lovely handmade touch to your home.


Materials:
• Glass juice jug (you can also use other bottles or cans you might have at home)
• Acrylic paint (color of your choice. This will be the darkest color of your vase)
• White acrylic paint
• Small container to mix paint
• Brush
Clear glaze or Mod Podge (not pictured)

Jun 12, 2012

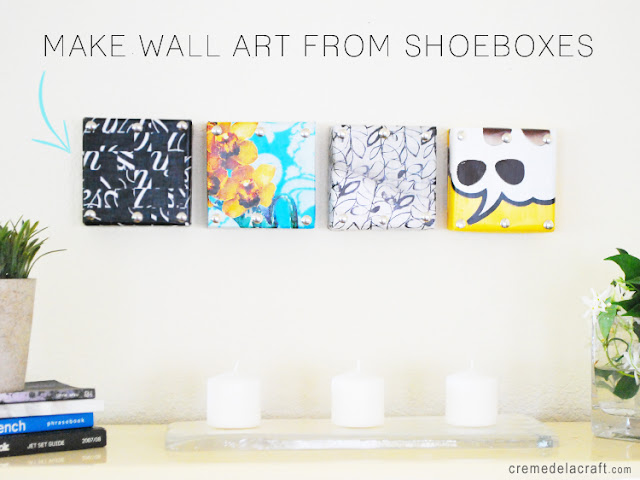
DIY: Mini Wall Art From Shoebox Lids


This project is a semi-sequel to the DIY: Shoebox Wall Shelves I posted a few weeks ago. After using all my shoeboxes for that project, I was left with a bunch of shoebox lids and the crafter in me knew I couldn't just throw them out! I realized that shoebox lids are similar in depth to canvas boxes, and so this DIY project emerged! Just cut 'em up, add your favorite decorative paper (or cut out graphics from old magazines like I did) and you've got custom wall art for your home. Imagine an entire wall of these! Follow the steps below to create your very own.


Materials:
• Shoebox lids (1 regular size shoebox lid makes 2 pieces of wall art)
• Decorative paper (I repurposed mine from old magazines and shopping catalogs)
• Scissors (not pictured)
• Ruler
• Pen
• Tape
Glossy decoupage medium
• Foam brush
Thumb tacks 


Jun 5, 2012

DIY: Mini Notebook From A Cereal Box


I am still a little old-fashioned when it comes to taking notes and I usually have at least two pocket notebooks in my purse at all times (one for craft ideas and the other for making to do lists). I realized that I am also very picky when it comes to choosing the perfect notebook, and for those of you who are like me, I've got a solution for you!

Follow the directions below to make your own personalized, budget-friendly pocket journal out of cereal boxes inspired by my favorite Moleskine notebooks. Choose your favorite decorative paper and a stylish button to create the perfect notebook that suits your own style. These were so easy and fun to make, I ended up making four...one for me and three for my friends.


Materials:
• Cereal box (1 cereal box makes 2 notebooks. You can also use cardboard, cardstock or gift boxes)
• Paper for the inside pages (I used 20 pieces of 8.5" x 11" computer paper, but you can also use lined or graph paper)
• A piece of decorative paper (to cover the spine)
• Scissors
• Ruler
• Pen
• Glue stick, tape runner or double-sided tape
• Needle and embroidery floss
• Button


47bee1d0-a84a-4403-86ea8f94ad2bc4df
Pin It button on image hover